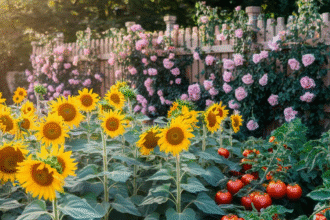
Tulips are one of those flowers that instantly signal the arrival of spring. This makes them one of the most popular spring flowers.
- What Are Tulip Bulbs and How Do They Grow?
- Best Time to Plant Tulip Bulbs
- Choosing Healthy Tulip Bulbs
- Where to Plant Tulip Bulbs
- Preparing the Soil for Tulip Bulbs
- How Deep and How Far Apart to Plant Tulip Bulbs
- Step-by-Step Guide: How to Plant Tulip Bulbs
- Step 1 – Digging the Planting Hole
- Step 2 – Placing the Bulb Correctly
- Step 3 – Covering, Watering, and Mulching
- Planting Tulip Bulbs in Pots or Containers
- Watering and Caring for Tulip Bulbs After Planting
- How Long Do Tulips Take to Bloom?
- What to Do After Tulips Bloom
- Do Tulips Come Back Every Year?
- Common Mistakes When Planting Tulip Bulbs
- Final Thoughts — Plant Tulip Bulbs Once, Enjoy Them for Years
- Frequently Asked Questions (FAQs)
They not only create a colorful spring display, but their versatility also makes them a beautiful addition to any garden, as they come in various colors, sizes, and forms.
Their bright colors, clean lines, and elegant shape make gardens look alive after the long, dull months of winter.
Tulips are beginner-friendly, carrying everything they need to bloom right inside the bulb. Also, they work just as well in formal garden beds as they do in casual borders, containers, or even window boxes.
Despite their beginner-friendly reputation, many first-time gardeners make common mistakes when planting tulip bulbs. They either plant the bulbs too shallowly, too early, too late, or in poor-draining soil, among other common mistakes that would be treated later.
This guide will help you plant tulip bulbs the right way from the start. You’ll learn how to choose the right bulbs, when and where to plant, how deep to place your bulbs, how to prepare the soil, and all the simple maintenance to do after planting.
This simple but essential guide will help you avoid beginner mistakes and enjoy strong, healthy tulips that reward your effort with successful blooms.
What Are Tulip Bulbs and How Do They Grow?
Tulip bulbs are fleshy, underground storage organs that contain all the nutrients and energy the plant needs to grow, thrive, and flower. Think of a tulip bulb as a subterranean survival kit.
Inside a tulip bulb are tightly packed layers of modified leaves that store carbohydrates, along with the embryonic leaves, and the tiny precursor to the flower itself.
These stored carbohydrates (energy) allow the tulip to grow quickly once conditions are right, even before it can produce its own food through photosynthesis.
Unlike seeds, which contain only the genetic blueprint for a plant, bulbs do not start life from scratch. Seeds must germinate, develop roots, stems, and leaves, and rely solely on immediate soil nutrients before building energy reserves over time.
The main difference between a bulb and a seed is the starting point. Seeds are embryos that require a complex set of external conditions to germinate from scratch.
Bulbs, on the other hand, are mature plant structures that can produce a full plant almost immediately. This is why tulips grown from bulbs flower much faster than plants grown from seeds.
The tulip growth cycle begins when the bulb is planted in autumn. During winter, the bulb remains dormant while developing roots. In early spring, shoots emerge above the soil, followed by leaves and the flower bud.
After blooming, the leaves continue photosynthesis to replenish the bulb’s energy, preparing it for the next growing season. With this understanding, let’s consider the best time to plant tulip bulbs.
Best Time to Plant Tulip Bulbs
For a successful gardening, timing is often more important than technique. For tulip bulbs, the best planting time is in the fall (autumn), generally ranging from late October through December, depending on your local climate.
Fall (or autumn) is ideal for planting tulips because it allows the bulbs to establish strong roots in cool soil before entering a winter dormancy period, which is essential for triggering spring blooming – a process known as vernalization.
This brief growth cycle should help you:
- Dormancy and rooting (fall): Once planted in fall, when the soil is cool, the bulb wakes up. As the ground cools, it sends out a network of roots to anchor itself and absorb moisture before the deep freeze of winter.
- Chilling (winter): This is the reset button, a period of cold (vernalization) to trigger the hormones responsible for stretching the flower stem.
- Emergence (early spring): As the soil warms, the stored starches (energy) convert into sugars, fueling a rapid growth spurt. Green shoots pierce the surface.
- Flowering (mid-spring): The stem elongates, and the bud opens. After the bloom fades, the leaves stay green for several weeks, performing photosynthesis to recharge the bulb’s energy stores for next year.
When to plant tulip bulbs is largely influenced by soil temperature. Many beginners often make the mistake of planting tulips strictly by the calendar rather than the thermometer.
You should plant tulip bulbs when soil temperatures drop below 15°C (60°F). The ideal soil temperature is between 40°F and 55°F (4°C and 13°C).
Planting when the soil is too warm can cause the bulbs to sprout prematurely and perish in the first frost or develop fungal diseases like tulip fire. Cold soil, on the other hand, helps prevent bulb rot and discourages hungry pests that are more active in the late summer.
Because climates vary by location, when to plant tulip bulbs also changes depending on where you live. Irrespective of your location, this regional timing guideline will frame your decision-making.
- Cold/Northern Climates (Zones 3–5): Plant early, from late September through October, aiming for 6 to 8 weeks before the ground freezes solid.
- Moderate/Mild Climates (Zones 6–8): October to mid-November is ideal, with November being optimal to reduce disease risk.
- Warm Climates (Zones 8–10): In areas with mild winters, plant in late November or December. It is crucial to purchase pre-chilled bulbs or refrigerate them for 10 to 14 weeks before planting.
If you miss the fall (autumn) window, bulbs can still be planted as late as January if the ground is workable, though they may produce smaller blooms. Ultimately, the goal is to get them in the ground early enough so they can establish a strong root system, but late enough to avoid the heat.
Choosing Healthy Tulip Bulbs
Choosing high-quality tulip bulbs is the foundation for a spectacular bloom. Remember that the leaves and flowers are already pre-loaded inside the bulb, so choosing a high-quality bulb ensures strong stems, vibrant blooms, and a stunning spring display.
Choose bulbs that look plump and feel dense, not shriveled or light. To guide you, here’s how to identify good-quality bulbs:
Consider the size: Larger bulbs generally mean better, more reliable blooms. Larger bulbs have more stored carbohydrates, which typically results in taller stems and larger, more vibrant flower heads.
Check the firmness: Gently squeeze the tulip bulb; it should feel solid and heavy for its size, similar to a small apple, onion, or potato. Avoid bulbs that feel mushy, light, hollow, or that have soft spots. These signs often indicate inner decay, dehydration, or improper storage.
Look out for mold: The bulb’s papery, brown outer skin should be relatively intact, although some splitting is acceptable. Avoid bulbs with excessive, damp mold or powdery white/blue residue, as these suggest Fusarium or Botrytis infection.
A small amount of surface dust or dry, superficial blue mold is usually acceptable, but it should be avoided if possible.
Opting for certified or disease-free bulbs is the best move. Prioritizing certified bulbs ensures that you’re buying stock inspected for diseases like Tulip Fire or Fusarium, which can devastate an entire garden bed.
Using healthy, reputable, or certified virus-free bulbs ensures higher blooming success rates in the first year.
Finally, avoid bulbs with large green shoots already emerging or those sold in sealed plastic, as they need to breathe and stay dormant before planting.
Where to Plant Tulip Bulbs
While tulips can fit into almost any space in the garden, they are picky about two things – sunlight and drainage – to produce those vibrant, upright blooms.
To ensure a vibrant spring display, plant tulip bulbs in a location that receives full, direct sun at least 6 to 8 hours a day. This is sufficient for strong stems and optimal blooming.
While they can tolerate partial shade, especially in warmer regions, they generally require ample sunlight to thrive. Tulips grown in low light tend to develop weak, leggy stems that lean or flop over as they reach for the sun.
Tulips can be planted in garden beds, along borders, or in containers if you have limited space. Whatever medium you choose to use, we recommend that you plant tulips in groups of 10 or more to create a high-impact drift of color.
When planting in garden beds or along borders, choose a well-drained, sunny location where water does not accumulate.
Also, place bulbs behind perennials, such as Hostas or Daylilies, or in front of shrubs in a border to help hide their fading foliage after blooming or yellowing leaves.
Planting tulips in containers is ideal for areas with heavy soil or limited space. It also aids portability, allowing you to move the display to your front porch, patio, or desired area exactly when they start to bloom.
Use a deep container of at least 10in. to 12in. depth with ample drainage holes to prevent waterlogging. You can plant them in tight, multi-layered lasagna style, as they require less space than in the ground.
As mentioned earlier, proper drainage is one of the most critical factors to consider when planting tulips, as wet soil/excess moisture often causes bulbs to rot. Bulbs are prone to fungal rot if they sit in heavy, waterlogged earth. Therefore, a site with excellent drainage is non-negotiable.
If your soil is heavy clay, improve it with organic matter, compost, or grit. Raised garden beds are excellent for improving drainage. For optimal results, ensure good air circulation to reduce the risk of diseases like tulip fire.
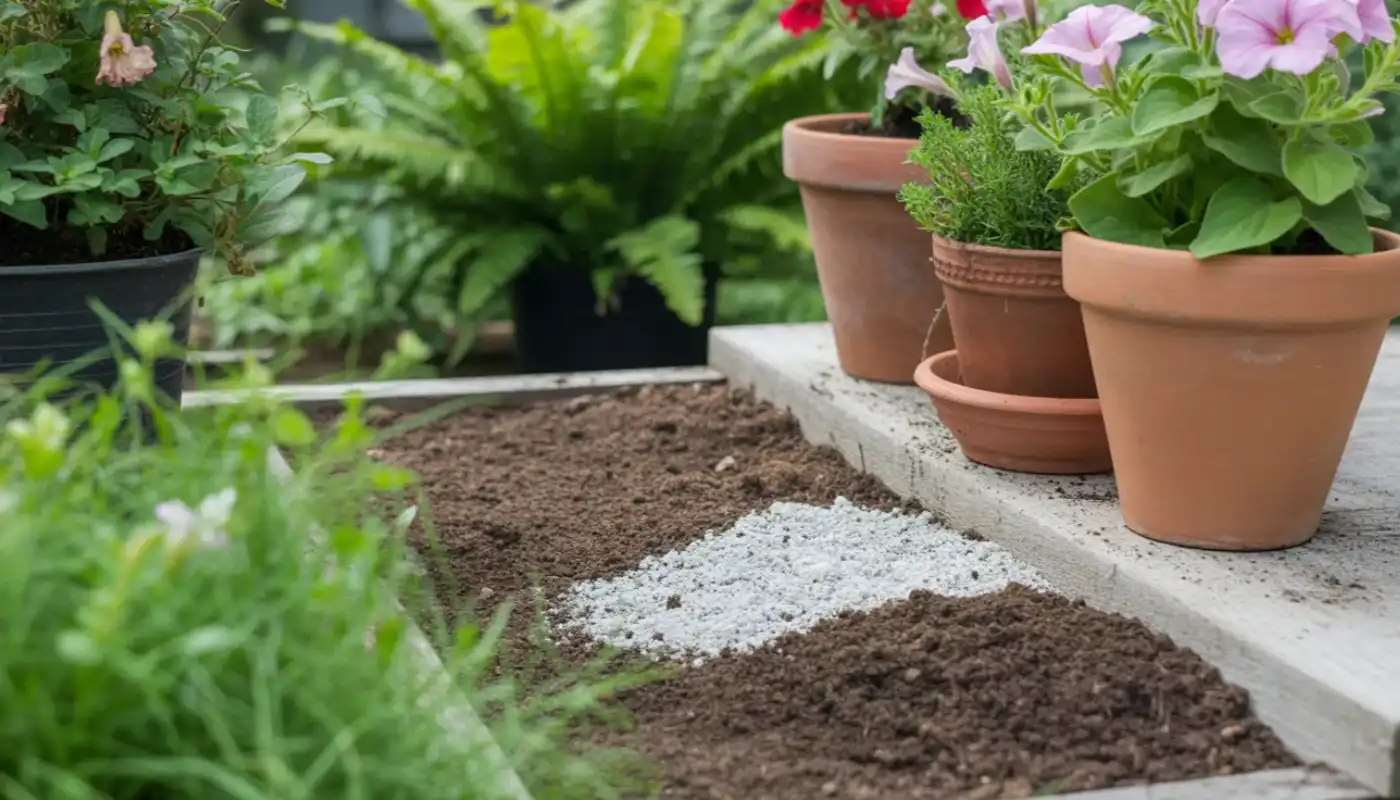
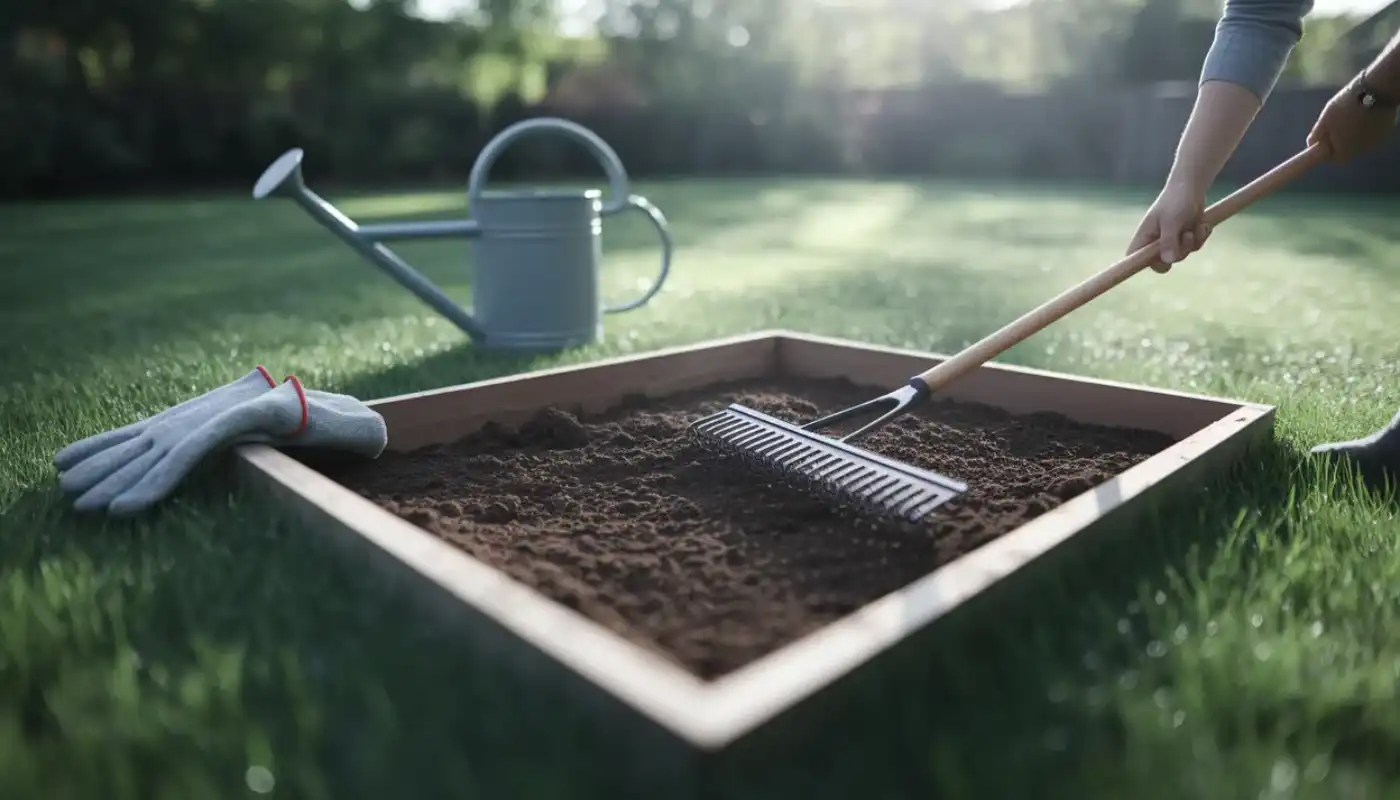
Preparing the Soil for Tulip Bulbs
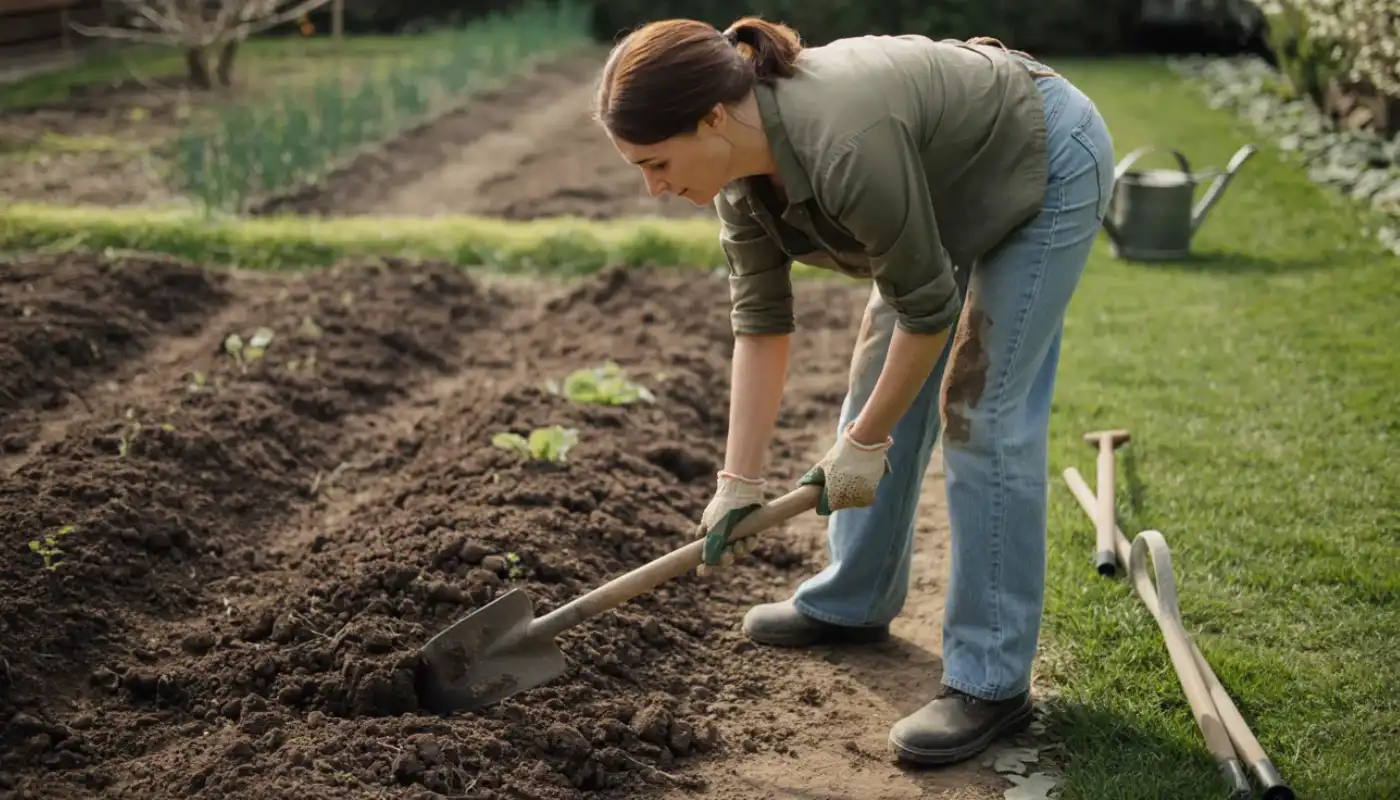
Preparing the soil for tulip bulbs is the most critical step to ensure healthy growth and prevent bulb rot.
The best soil for tulip bulbs is well-drained, loose, porous, fertile, sandy loam soil. This soil type allows roots to expand effortlessly while ensuring that excess water moves away from the bulb quickly.
In terms of pH level, tulips prefer a soil pH that is neutral to slightly acidic, ideally between 6.0 and 7.0. However, the most critical factor is drainage. Tulip bulbs are essentially fleshy sponges; if they sit in oversaturated soil, they will succumb to fungal rot before the first leaf even emerges.
If you have sandy or heavy clay soil, you may need to improve the soil structure to promote plant growth.
Heavy clay soils hold too much moisture and should be amended with coarse sand, grit, or organic matter (compost, peat moss) to improve drainage. Incorporate any of these materials to a depth of 12in. to 18in.
Sandy soil, on the other hand, drains too quickly and struggles to hold nutrients. You need to improve them by mixing in plenty of compost, aged manure, or leaf mold to enhance moisture retention.
For very heavy, waterlogged soil, planting in raised beds or on slopes is highly recommended.
Irrespective of your soil type, incorporating well-aged compost or well-rotted organic matter is the best way to ensure long-term success. Simply dig a few inches of compost into your planting bed before you start making holes.
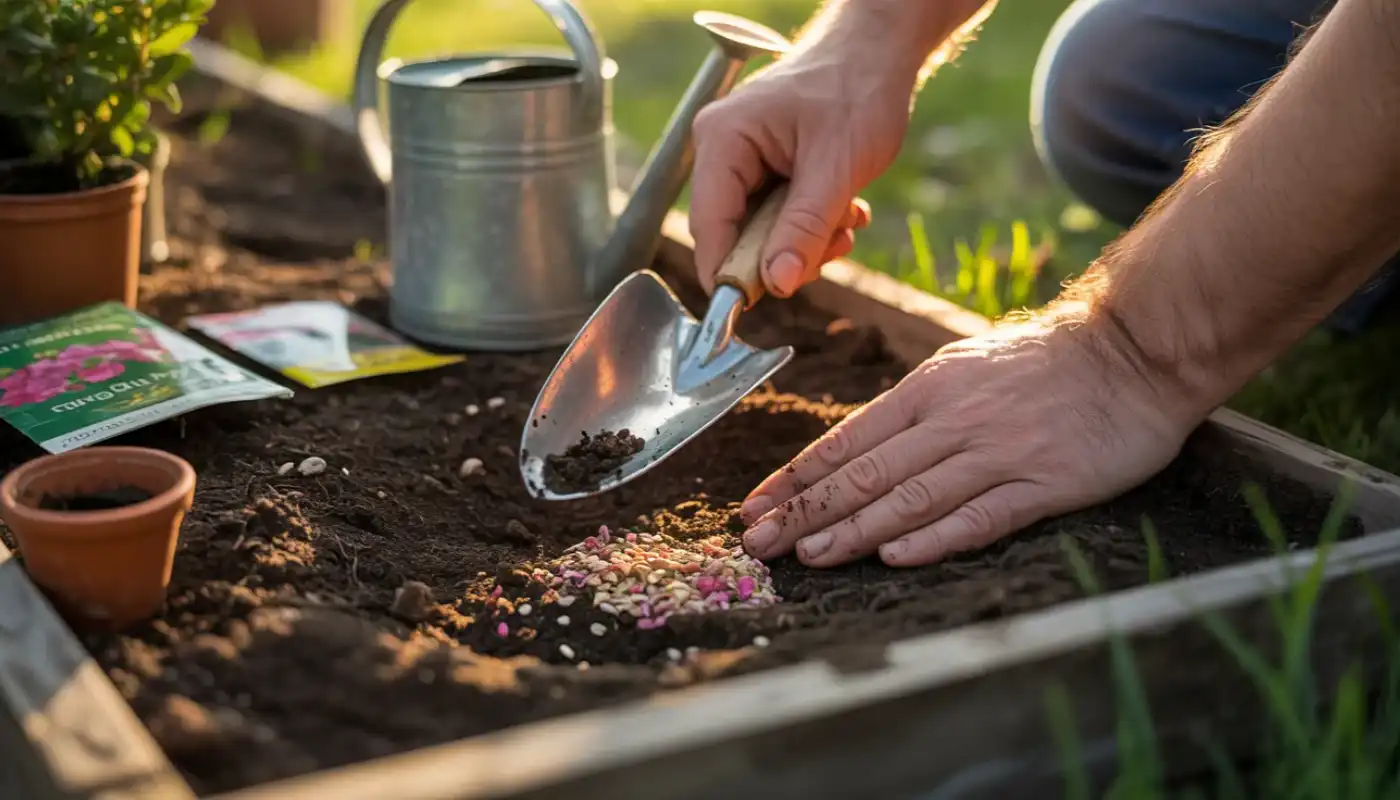
If you’re using fertilizers, add a balanced, slow-release fertilizer or bone meal to the soil at planting time to promote root development.
How Deep and How Far Apart to Plant Tulip Bulbs
Planting at the correct depth and spacing isn’t just about stability; it’s about survival. It impacts everything from germination rates and root development to long-term stability and overall health.
How deep to plant tulip bulbs?
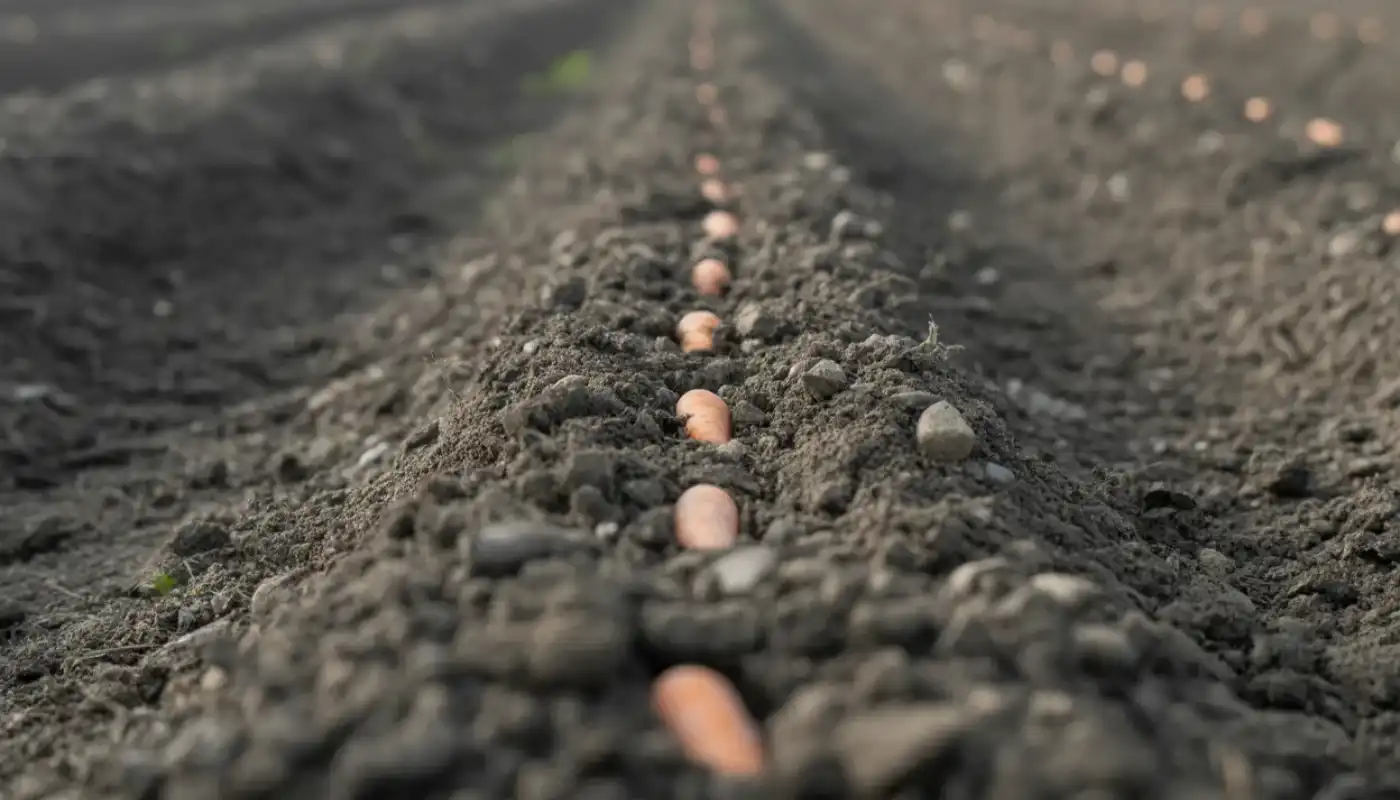
The general rule of thumb for planting bulbs is to dig a hole three times as deep as the bulb is high. For most tulip bulbs, this translates to a planting depth of 6in to 8in.
When planting, measure from the soil surface to the base of the bulb, not the top. In sandy soils, you can plant slightly deeper to keep bulbs stable, while in heavy clay soils, planting closer to 5in. or 6in. is better to prevent rot.
Make sure the pointed end of the bulb is facing upwards.
How far apart to plant tulip bulbs?
For a full, lush look, space tulip bulbs 4in. to 6in. apart. If you’re planting in containers or aiming for a denser display, they can be placed closer at about 3in. Apart or tighter.
However, letting them touch too closely can lead to competition. Typically, planting in groups of 5, 7, or 9 produces a more natural, appealing look than rigid rows.
Why does planting depth matter?
Planting at the correct depth is crucial for several reasons, which include:
Temperature Regulation: Deeper soil acts as an insulator, protecting the bulb from fluctuating surface temperatures and the freeze-thaw cycles that can push bulbs out of the ground.
Root Development: Proper depth provides enough vertical space for a robust root system to anchor the plant. This is vital for tall varieties that need to withstand spring winds without toppling over.
Pest Prevention: A bulb buried deep is much harder for squirrels and chipmunks to sniff out or dig up.
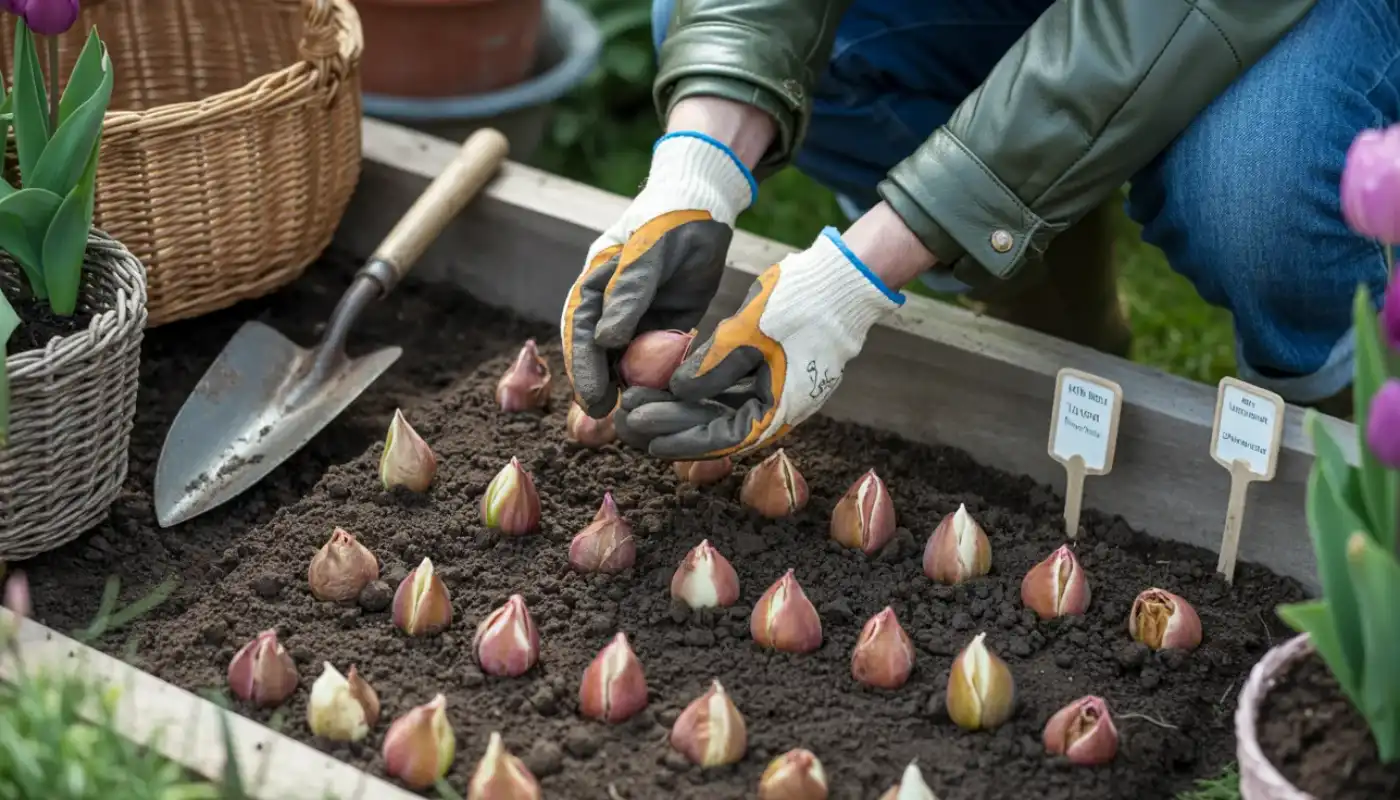
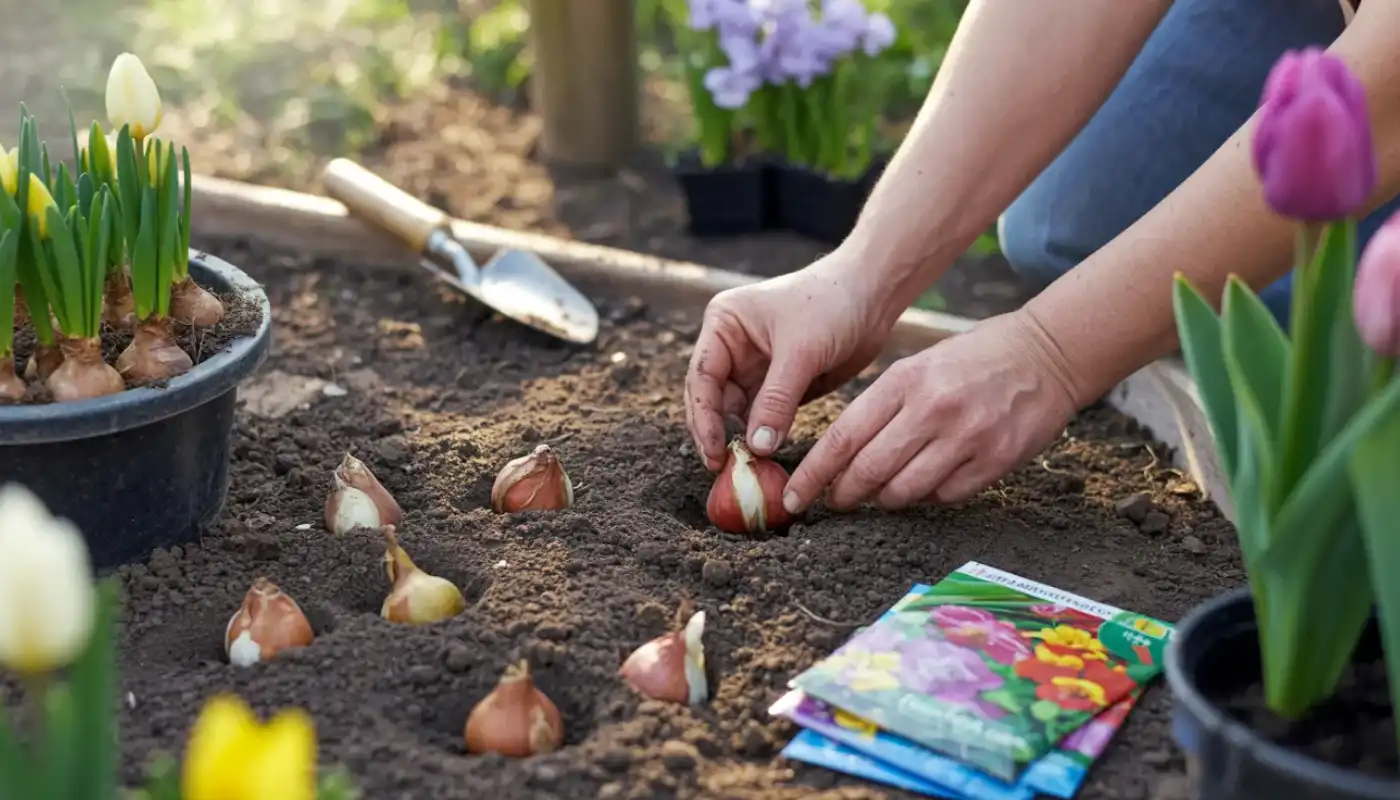
Step-by-Step Guide: How to Plant Tulip Bulbs
Now that you’ve mastered the ‘when’ and the ‘where’ to plant tulips, it’s time to get your hands on planting.
Planting tulip bulbs is a rewarding fall activity that sets the stage for a vibrant spring display. However, precision here ensures you won’t be staring at an empty patch of mud come April.
Here is a beginner-friendly, step-by-step guide to planting your tulip bulbs correctly, turning those brown, papery bulbs into a spring masterpiece.
Step 1 – Digging the Planting Hole
Before you start digging, gather your essential tools:
- A hand trowel for a few bulbs, a bulb planter when planting a large drift of fifty or more, or a long-handled spade for digging a trench.
- A garden fork for loosening compacted soil.
- Gardening gloves
- Compost or bulb fertilizer to nourish the bulbs (though optional).
As we discussed earlier, plant bulbs at a depth of about 6in. to 8in. (15cm. to 20cm.). Alternatively, measure from the base of the bulb and plant at a depth three times its height.
In colder regions, deeper planting (8in.) helps insulate the bulbs from temperature swings and protects them from hungry critters.
Space bulbs 4in. to 6in. apart for most varieties. For a more dramatic effect, plant tulips closer together, about 2in. to 3in. apart.
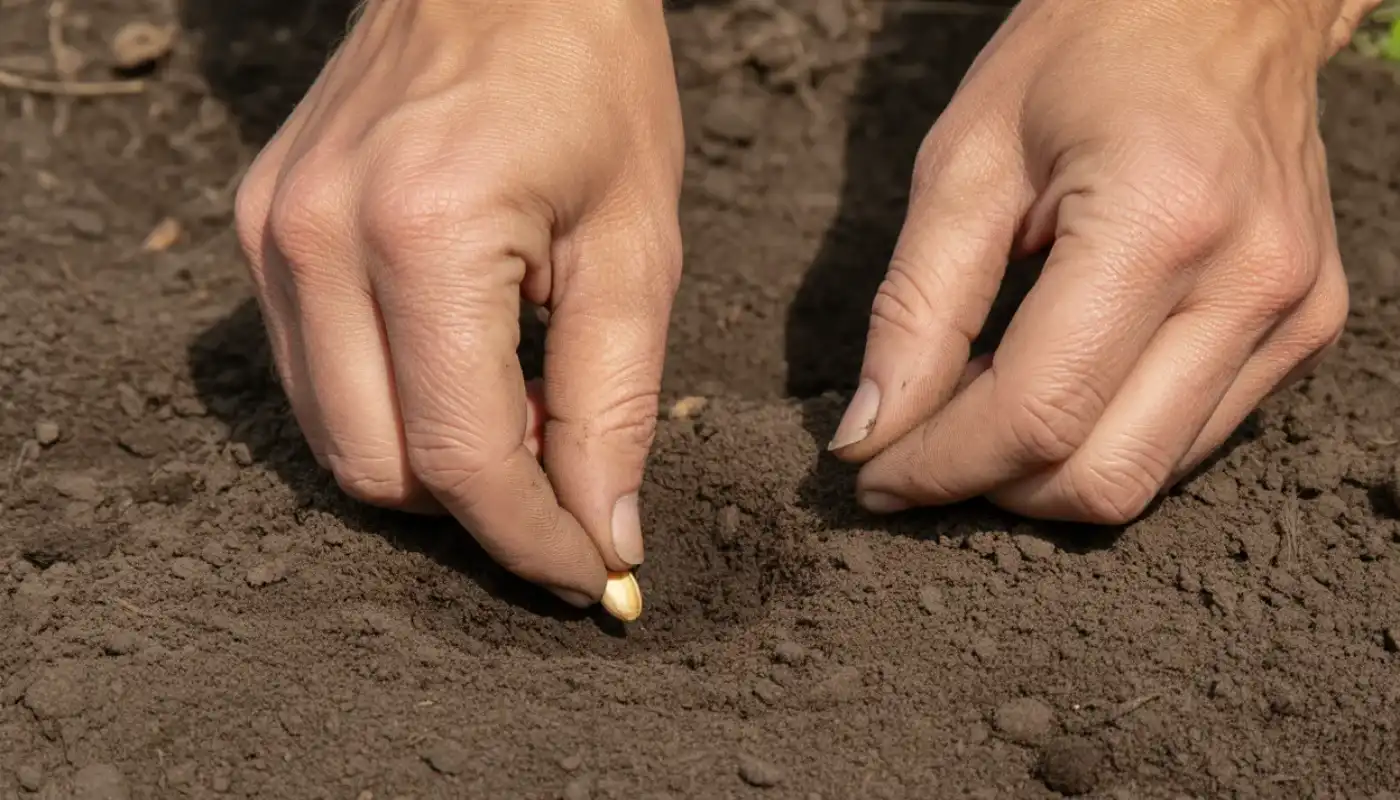
Step 2 – Placing the Bulb Correctly
Once the hole is prepared, always place the bulb into the soil with the pointed end facing up. The pointed end is where the shoot will emerge, while the flat end is the base from which roots will grow.
If you accidentally plant a bulb upside down, don’t panic. Tulips have geotropism, meaning they can sense gravity. They will eventually send their shoots upward. However, avoid upside-down planting.
While tulips are remarkably resilient and can sometimes correct their position, planting them upside down may cause delayed growth or weak, distorted flowers because they will waste a massive amount of stored energy doing a U-turn underground.
If the bulb is placed sideways, it will still grow correctly.
Step 3 – Covering, Watering, and Mulching
Once your bulbs are seated comfortably, it’s time to put them to bed for the winter.
After placing the bulbs in the holes, cover them with the loosened soil, filling the hole completely. Pat the soil down gently to remove large air pockets, but do not pack it tightly, as this can impede root growth.
Also, avoid stomping the soil down with your boots, as this can compact the earth and make it difficult for the tender shoots to break through in the spring.
Immediately after covering the bulbs, give the area a thorough watering.
This isn’t just to give the bulb a drink; it helps settle the soil around the bulb, eliminating large air pockets that could cause the bulb to dry out or freeze unevenly, and providing necessary moisture for root development.
After this initial watering, you don’t need to water again unless the fall is exceptionally dry or until you see green shoots in the spring.
In areas where the winter is particularly harsh, apply a 2in. to 3in. (5cm. to 7cm) layer of mulch, such as shredded bark, straw, compost, or evergreen boughs, over the planting site.
This acts as a thermal blanket, keeping the soil temperature consistent and preventing the ground from heaving during frost cycles.
Planting Tulip Bulbs in Pots or Containers
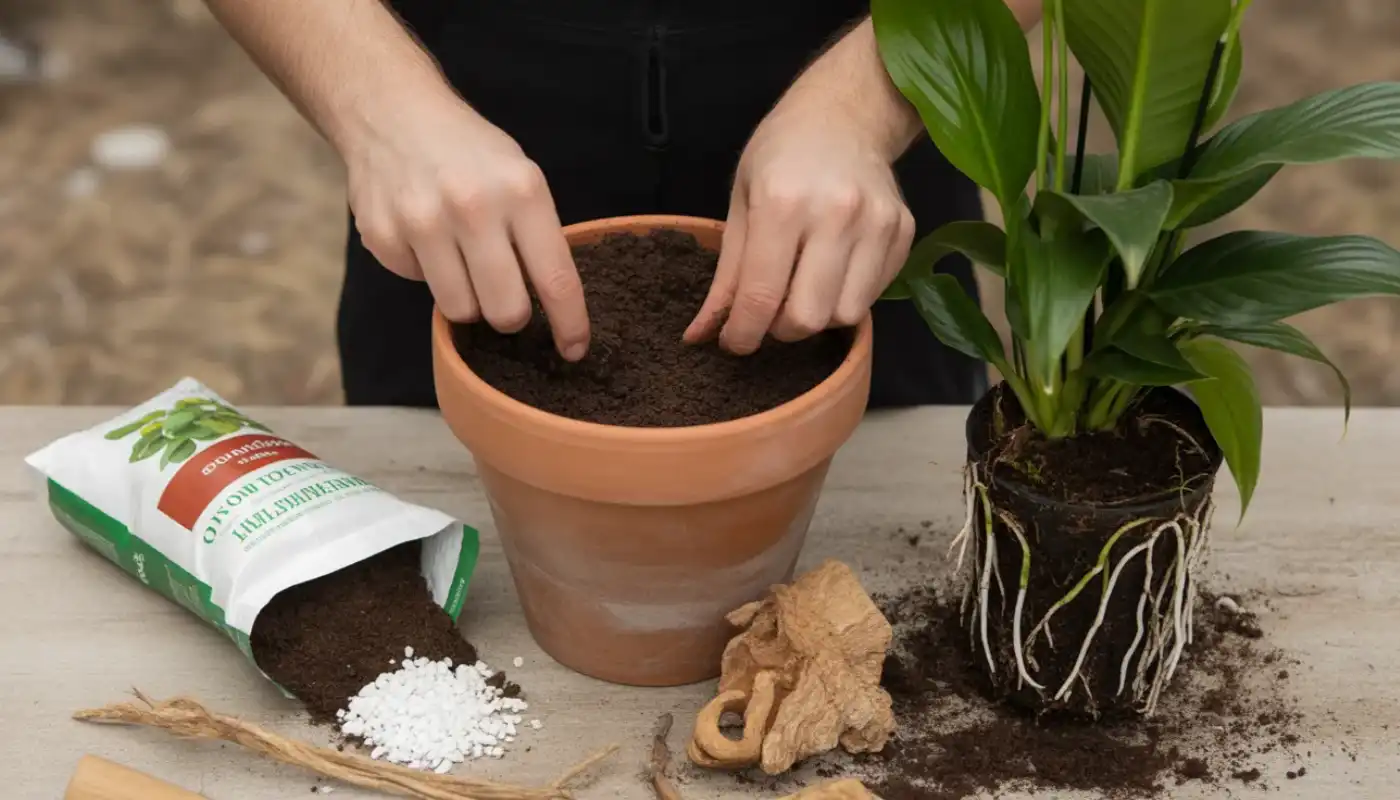
If you have limited garden space or want to decorate your doorstep, planting tulip bulbs in pots is a fantastic alternative to in-ground gardening. Because containers allow for total control over soil quality and drainage, they often produce some of the most flawless blooms.
For a healthy display, choose containers that are at least 10in. to 15in. deep to provide ample room for root growth. Larger containers, around 18in to 24in in diameter, are ideal for holding several bulbs, ensuring they don’t get overcrowded.
Another critical factor is drainage. Always use pots or containers with large drainage holes at the bottom to prevent the bulbs from sitting in water, which causes fatal rot.
In terms of soil mix recommendations, avoid using regular garden soil, which can become compacted and waterlogged in a confined space.
Instead, use a high-quality, well-draining, peat-free potting mix blended with a bit of perlite or coarse sand. This ensures the bulbs stay hydrated without sitting in stagnant water.
To improve aeration and prevent waterlogging, you can amend this mix with extra grit, perlite, or sandy soil (in a 1:3 ratio).
Where you choose to place your pots – indoors or outdoors – influences their management.
For outdoor containers, which are the most common, follow the same timing as in-ground planting (late fall).
If you live in a region with deep freezes, move the pots to an unheated garage or wrap them in burlap to prevent the soil from freezing solid, which can damage the bulbs.
To grow tulips indoors, you must simulate winter. This process, called ‘forcing,’ requires you to keep the potted bulbs in a dark, cold spot (like a refrigerator or basement) at about 40°F to 45°F (4°C to 7°C) for 12 to 16 weeks before bringing them into the light to bloom.
Here are some other attractive indoor plants you can consider for your living room in 2026.
Watering and Caring for Tulip Bulbs After Planting
As mentioned earlier, water the bulbs thoroughly immediately after planting to settle the soil and stimulate root growth before the deep freeze sets in. After this, you can generally put the watering can away, as tulips require minimal moisture during the winter dormant phase.
If the fall is rainy, no further watering is necessary. However, during dry spells in late winter or early spring, when foliage emerges, water once per week (roughly 1in.).
Potted tulips dry out faster and should be checked weekly, watering when the top inch of soil feels dry.
Nevertheless, avoid overwatering as this is the primary cause of bulb rot. Never allow bulbs to sit in standing water, as this kills them.
Ensure the planting site has well-drained, porous soil, or use raised beds. In pots, ensure drainage holes are clear and do not leave saucers filled with water. If the autumn is dry, water only once a week; otherwise, let nature take its course.
For in-ground tulips, no special protection is needed, but applying 2in. to 3in. of mulch after the ground freezes helps regulate soil temperature and retain moisture.
In containers, move them to a sheltered, cool, dark spot (like a garage) to prevent excessive freezing/thawing cycles, ensuring the soil does not dry out completely.
Do not fertilize in winter; wait until green shoots appear in early spring.
How Long Do Tulips Take to Bloom?
For tulips, the process of development begins the moment they hit the soil in the fall.
After planting in fall (September to November), bulbs spend October and November establishing roots and preparing for winter. Over the first 4 to 6 weeks, the bulb focuses entirely on root development, anchoring itself and drinking in moisture before the ground freezes.
Once the deep cold of winter sets in, the bulbs then need 10 to 16 weeks of cold temperatures below 50°F (10°C) to undergo a rest period necessary for spring flowering. This is where internal chemical changes prepare the flower bud for its debut.
As temperatures rise in early spring (late February to March), the first green shoots (leaves) emerge from the soil.
Shoots often appear 1 to 3 weeks before the stem reaches full height, with flower buds typically developing 4 to 5 weeks after the first sprouts are visible.
Tulips bloom in spring, usually between March and May, with the exact timing depending on whether they are early, mid, or late-season varieties.
- Early variety: Late March to early April.
- Mid-season variety: Mid-April.
- Late variety: Late April to May.
In a nutshell, tulips typically take 4 to 6 months from planting in the fall to blooming in the spring. Individual flowers usually last 1 to 3 weeks.
What to Do After Tulips Bloom

After your tulips have finished their spectacular spring display, how you treat them in the post-bloom phase will determine whether they will return as a perennial display next year or simply vanish as annuals.
Here are some key post-bloom care focuses on allowing the bulbs to recharge their energy stores.
Deadhead spent flowers: Once the petals fall off, remove the faded flower head by cutting or snapping it off at the base of the flower stem, just above the top leaf. It is essential not to cut off the foliage or the entire stem.
Deadheading prevents the plant from wasting energy on seed production, redirecting that energy down to the bulb for next year’s bloom.
Let leaves die back naturally: Resist the temptation to cut back the green or yellowing leaves as soon as the flower is gone, because they look untidy to tidy up the garden.
Green leaves are essential for photosynthesis, allowing the plant to gather sun energy and create food for the bulb. Leave the foliage in place for at least 4 to 6 weeks after blooming, or until it has fully turned yellow or brown, brittle, and withered.
You can plant annuals around them to hide the unsightly foliage while it matures.
When removing withered leaves, remove them gently by pulling them away or cutting them at the soil level.
Feed bulbs for next season: While established bulbs often have enough energy stored, you can boost them by applying a balanced, slow-release, low-nitrogen bulb fertilizer or compost in late spring after flowering.
This provides the final boost of nutrients the bulb needs to build a healthy flower embryo for the following spring.
Avoid high-nitrogen fertilizers, as this can lead to bulb rot. If you are growing tulips in a high-importance area and want the best display, consider lifting the bulbs once the leaves die down to store them in a cool, dry place for replanting in the autumn.
Do Tulips Come Back Every Year?
Tulips are actually perennials, meaning they have the capacity to return and bloom year after year. However, many gardeners treat them as annuals, replanting them every fall.
This is because many highly hybridized tulip varieties often produce smaller, weaker blooms in their second or third year.
They put so much energy into their spectacular first-season bloom that the mother bulb often splits into several tiny bulblets that are too small to flower the following year.
Perennial vs. Annual Behavior
True tulip species and certain hybrids, such as Darwin Hybrids, are reliable perennials that can last for years in favorable conditions. Conversely, many popular, flashy hybrids (like Parrot or Double Late types) are bred for first-year impact and rarely return with the same strength.
Factors Affecting Reblooming
Whether your tulips return depends on these main factors:
- Climate: Tulips require a cold winter dormant period and thrive in dry summers. They struggle in warm, humid climates, which can cause bulb rot.
If your garden is heavily irrigated or you live in a rainy climate, the bulbs are likely to rot or stay too cool to trigger next year’s bud.
- Soil: Well-drained, sandy soil is essential; heavy, wet soil leads to fungal disease and rotting.
- Variety: Species tulips (e.g., T. tarda) and Darwin Hybrids have stronger perennializing tendencies than complex hybrids.
Tips to Encourage Repeat Blooms
To encourage your tulips to act as true perennials, follow these tips:
- Plant deeply: Plant bulbs 6in. to 8in. deep to protect them from heat and predators.
- Feed them: Apply a bulb fertilizer in early spring and again after the petals fall.
- Leave foliage: Do not cut back green leaves; let them yellow and die naturally, as they feed the bulb for next year.
- Deadhead: Remove spent flowers to stop energy from going into seed production.
- Proper care: Choose a sunny location and avoid watering the area during the summer dormancy.
Common Mistakes When Planting Tulip Bulbs

Even though tulip bulbs are remarkably resilient, certain mistakes can lead to a disappointing spring. Avoiding these common mistakes is essential for a vibrant spring display.
One of the biggest mistakes is planting too shallow or too late.
Bulbs should be planted at a depth of roughly three times their height (usually 6in. to 8in.) to protect them from winter freezing, rodents, and drying out.
Planting too late, after the ground has already frozen, prevents essential root establishment, resulting in weak or nonexistent blooms.
Another critical error is ignoring poor drainage issues.
Tulip bulbs are essentially fleshy storage organs and thrive in loose, well-draining soil; if planted in heavy clay or waterlogged areas, the bulbs will likely rot over winter. Amending soil with organic matter or creating raised beds can solve this.
Lastly, a common, harmful practice is removing foliage too early.
Once the flower dies, the remaining green leaves may look messy, with some turning yellow.
While it can be tempting to clean up these dirty and yellowing leaves, foliage must be left until it turns completely brown or withered, as it allows the bulb to photosynthesize and store energy for next spring’s blooms.
Cutting it prematurely starves the bulb and often leads to non-flowering plants in subsequent seasons. Patience in the late spring is the key to a successful return.
Final Thoughts — Plant Tulip Bulbs Once, Enjoy Them for Years
Planting tulip bulbs is one of the most rewarding, low-effort ways to ensure a spectacular, recurring spring display.
However, success hinges on following these core principles – selecting firm bulbs, choosing the right spot with full sun, planting them pointy-side up at the correct depth, planting in well-drained soil, spacing them 4in. to 6in. apart, and respecting the chilling period
After flowering, the most crucial step for longevity is leaving the foliage to yellow naturally; this process feeds the bulb for next year’s growth.
If you’re a beginner, don’t be intimidated; tulips are incredibly resilient. If you forget to plant them until early winter, they will likely still bloom. To guarantee they return, select perennial varieties like Darwin Hybrids or species tulips.
However, by putting in the effort to plant them properly once, you are investing in a lasting, vibrant, and ever-expanding garden for years to come.
Frequently Asked Questions (FAQs)
Yes, you can plant tulip bulbs in spring, especially pre-chilled tulip bulbs, but they likely won’t bloom the first year or might flower late. To succeed, bulbs must have been stored in a cold environment of about 40°F for 12 to 16 weeks to mimic winter, or they won’t bloom.
For the best visual impact, plant tulips in groups of at least 10 to 15 bulbs per cluster, or 50+ for large, dramatic drifts. Planting single bulbs in a thin line often looks sparse and accidental. Space bulbs at about 2in. to 4in. (5cm to 10 cm) inches) apart, or 9 to 12 bulbs per square foot. In containers, you can pack them tighter using a bulb lasagne method to create a thick, multi-layered show.
Yes, tulips can grow indoors, but they require a forcing process to simulate winter dormancy. Pot the bulbs in well-draining soil, covering them with compost, and store them in a dark, cool, dry place 40°F to 45°F (4°C to 7°C) for 12 to 16 weeks. Once shoots appear and are a few inches tall, move them to a sunny, warmer spot inside, where they will bloom.
Tulips are self-contained energy bulbs and do not strictly require fertilizer to bloom. However, fertilizing helps promote stronger, larger, and more consistent flowers, especially if you want them to return annually. When planting, you can mix a slow-release, low-nitrogen, high-potash bulb fertilizer into the soil. Once foliage is about 15cm high, applying a liquid fertilizer, such as seaweed extract, can support growth.
Tulip bulbs are quite cold-hardy, and their natural cycle actually requires a period of cold, freezing temperatures to trigger blooming in spring. If they freeze while dormant in the ground, they will generally be fine, as long as they are planted at the recommended depth of about 6in. to 8in. (15cm. to 20cm.) However, potted bulbs are more vulnerable, as extreme, repeated freezing and thawing can cause the bulbs to rot.